Today Pinterest is highly thought of by many bloggers and website owners as it can help to increase traffic to your website substantially in a short space of time. For all new Pinterest users with little design skills, myself included, it can be hard to know where to start with creating a successful pin that will get noticed by our fellow pinners.
Thankfully for you and me I have done a lot of research and spent a lot of time on Pinterest to write a guide on how to create a pin for Pinterest that will hopefully get noticed and help drive some substantial traffic to your site.
Pinterest is a visual social media platform so the bottom line is, if you are not creating visually appealing pins that stand out in the masses of pins on peoples smart feeds then you will find it very difficult to become successful with Pinterest and see substantial improvements in your traffic.
Don’t worry though that’s where I come in, I’ll outline all the main areas your pin will need to excel in so people will NEED to pin it to one of their boards and I’ve also thrown in a quick tutorial on how I create all of my pins for Pinterest.
Does size matter?
Yep, the size of your pin definitely has an impact. Pinterest recommend an optimum ration of 2:3. An example of a 2:3 ratio would be 600 x 900 or 1000:1500.
If you opt for a size outwith this 2:3 ratio parts of your pin could be cut off in peoples feed which could immediately turn people away from your pin, that’s the last thing we want.
Although 2:3 ratio pins are said to be the optimum size that does not mean you can’t resort to using longer pins. In fact recently I have spotted a lot of longer pins performing extremely well on the platform in the make money online niche.
Depending on your audience it is highly recommended that you study your competitors or other people promoting in the same niche as yourself to see what size of pins are performing well.
It is very hard to give an exact size for your Pinterest so it’s best to test with varying sizes until you find one with good results. To start though I’d definitely recommended creating pins at the 2:3 ratio. I am currently using a size of 1000 x 1500.
Although today Pinterest is still claiming that 2:3 ratio pins are the optimum many Pinterest users are ignoring this advice and opting for longer pins sometimes referred to as “giraffe pins”, for obvious reasons, but when starting out I would refrain from deviating from the 2:3 “golden rule” and stick with 2:3 ratio pins until you earn your place on the platform and start to gain some traction.
To make it simple and comply with Pinterests maximum and minimum size so your pins don’t get cropped in the feed I would recommend you don’t create any pins less than 600 x 900 and no greater than 1000:1500 if you choose to use the recommended ratio of 2:3.
If you still would like to use long pins then it is recommended that the minimum size should be 600 x 1260 and a maximum of 1000 x 2100.
Although pin size has an effect of how successful your pins will be this is only the start and there is many more factors that will affect how well your pin performs so read on and find out what else you will need to do to create a winning pin.
Use high quality images
This might seem completely obvious but you’d be surprised at how many low quality images are posted on Pinterest. The image you use can be the difference between hundreds of re-pins or absolutely 0.
As Pinterest is a visual social media platform this shouldn’t come as a surprise. Your image should stand out in the feed and capture the attention of anyone scrolling. That being said though you will want to keep your image relevant to your brand and brand and niche.
Write a relevant description
It should come at no surprise that adding insightful descriptions will help you gain more clicks on your pins. When writing your pin description you should stay completely on topic and discuss briefly what your users should expect if they were to click your pin and be directed to your website.
Keep the tone conversational and keep the language simple to appeal to a wider audience.
Pinterest acts as a search engine so make sure and include keywords that are relevant but don’t just stuff keywords that add no value to the reader.
Keep your descriptions simple and write in a way that appeals to your specific audience. To help get some inspiration on how to write your pin descriptions conduct some research into successful pins in your niche and see what your competitors are writing.
Make sure you descriptions are not written like a sales pitch as this will put a lot of readers off almost immediately.
Studies have shown that longer descriptions of around 300 characters receive the most pins so keep this in mind when you are writing your next pin description.
Use hashtags

Hashtags are another great method for increasing your pins exposure. By adding a few relevant hashtags Pinterest users who search for these hashtags could potentially be provided with your pin.
When a user clicks on a hashtag they will be shown pins that use the same hashtags so it’s beneficial to look at hashtags other people in your niche are using.
Once again keep your pins relevant. Within my niche I tend to use simple hashtags like “#makemoneyonline” or “#workfromhome”
These keywords are simple and used by many other people in my niche. Avoid using long irrelevant hashtags or the chances of someone searching for them are majorly reduced
Add your link
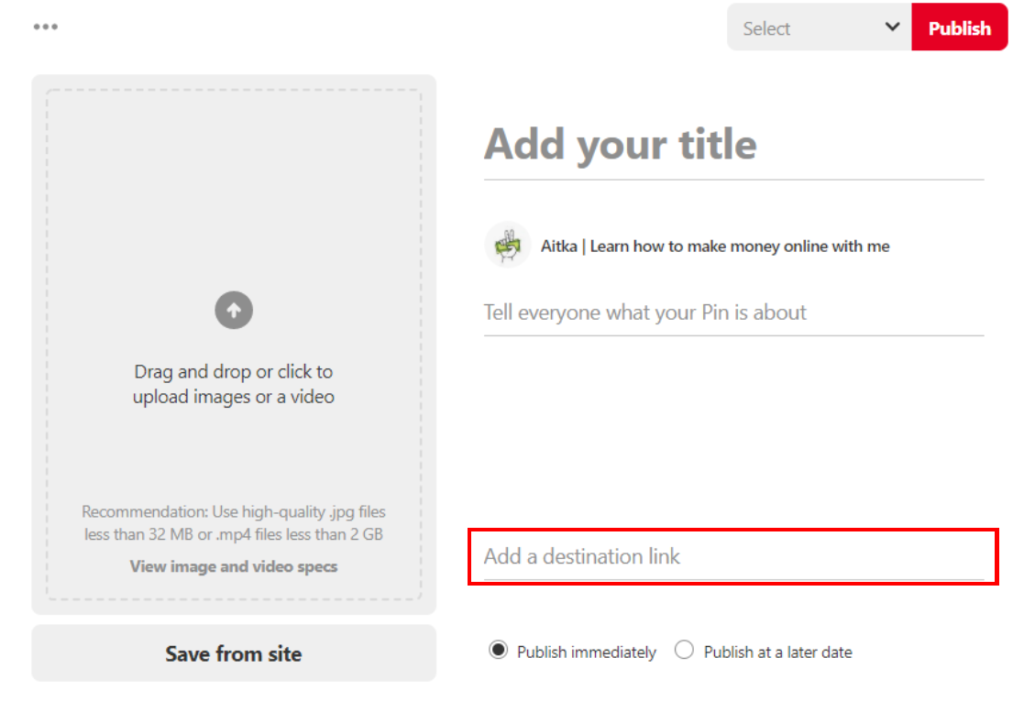
Since you are most likely using Pinterest as a method for increasing website traffic it should be obvious that all your pins should include a link to a specific page on your site. If your pin is created promoting a recipe make sure you link points directly to the recipe on your website.
If someone clicks through to your website home page it is highly unlikely that they will search your website for the recipe described with your pin.
Creating a pin on Canva – Full tutorial
There is many design tools and software you can use to design your new winning pins for Pinterest that include Photoshop, adobe illustrator or if you are looking for a decent toll that won’t cost you anything at all you could use Canva.
For the purpose of this guide I’ll talk a little about Canva as it’s the tool I have been using recently to create all of my Pinterest pins.
Canva is an extremely easy to use design tool that you can use in your internet browser and there is no limit to how many designs you make on the website.
As I said previously I am not very creative so I spent a lot of time looking into successful pins on the platform and I strongly advise you do this. You can find a lot of inspiration and ideas from other peoples pins.
To help give you an idea of how to use Canva to quickly and easily create a visually appealing pin I’ll work through the process of how I created my most recent pin.
Once you sign up to Canva you will be given the option to create a “Pinterest Graphic” which is 735 x 1102. I used this size to make my first few pins but felt it looked too small in comparison to other pins on my feed so decided to up the size I was using.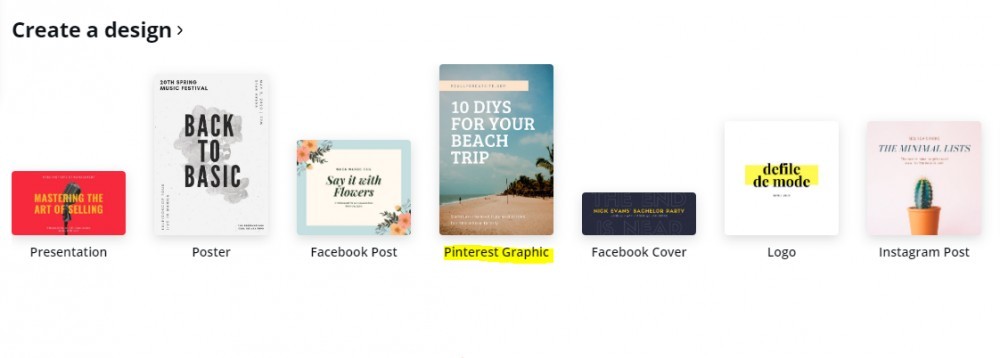
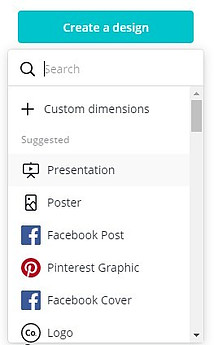
Creating a graphic with a custom dimension is extremely easy. In the top left of the web page, under your name you can click on create a design where the option for creating a custom design should be at the top as shown in the image below.
For my most recent pins I have been using the 2:3 ratio of 1000 x 1500. Once you have entered your custom dimension you will be taken straight to the design are where you can start designing your next pin which should look exactly like this.
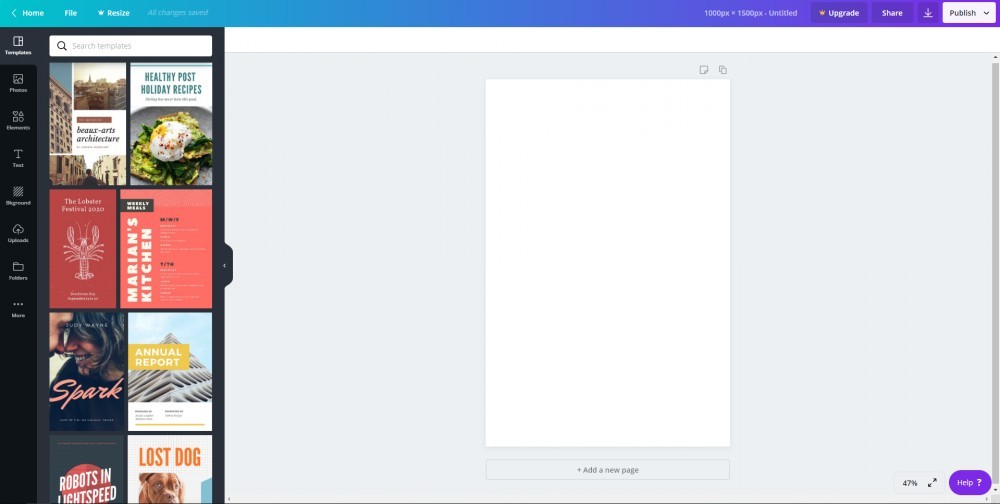
As Pinterest is a visual social media platform you’re probably not surprised that your design should start with a high quality image to begin with. Which image you use will depend purely on what niche you are in. It’s very hard for me to tell you what kind of image you should be using and you will need to use some initiative to search for winning pins within your respective niche. For me in the “make money online niche” I have seen a trend in successful pins where the image used is rather basic with some sort of colour accent. I search for all my images on adobe stock but unfortunately for you it’s not free and you will need to pay a monthly fee if you would like to search the millions of graphics. Don’t worry though there are many free websites that offer high quality royalty free images at no extra cost. These include pixabay.com and shutterstock.com. Canva also offers an abundance of free photos you can view by clicking on the “Photos” tab on the left-hand side of the screen.
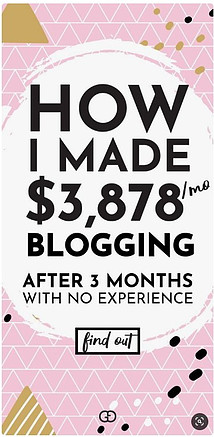
As I said many winning pins in my niche are very basic image used as a background with large text overlay to try to capture the attention of pinners. Here is a few examples of pins with thousands of repins.

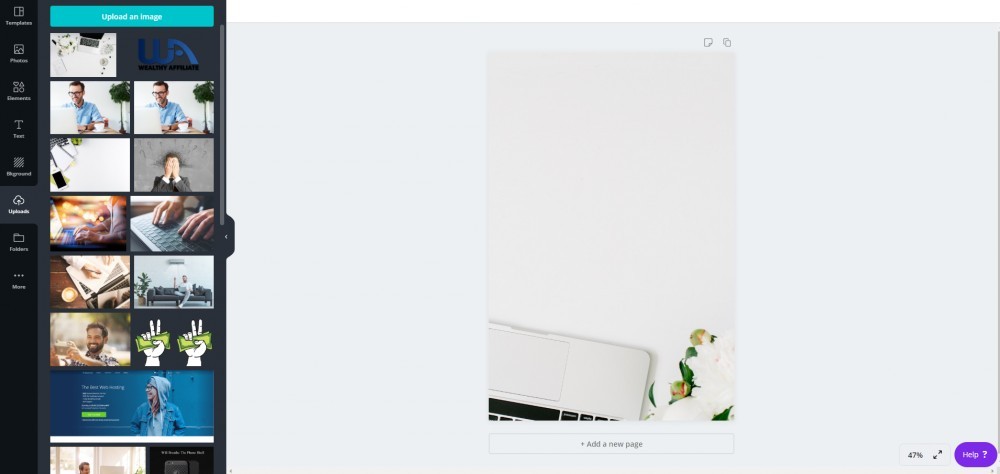
So after a quick search on adobe stock I opted for this image which incorporates a green colour similar to that of my brand colours so I decided to move forward with it. With Canva it is extremely simple to upload an image, simply drag the image from your folder into the uploads section on the menu on the left.
Once your image is uploaded you can simply drag it onto the design area to fill the full area. I decided against doing this for this pin as I wanted the image flipped so I simply dragged it onto the screen without filling the full area, rotated it fully and then resized it to fit. This was the outcome;
Extremely simple so far but now it becomes slightly more tricky. Fonts play a huge part in creating an eye-catching pin. Once again by researching a lot of winning pins the ones that perform the best seem to use multiple fonts. A bold font for the important words on the pin and a more creative font.
If you are looking for some ideas on what fonts go well together on Canva to substantially improve your pins then have a read at this post for 6 of the best font pairings.
I initially started using a few of these font pairings but decided I wanted a bolder font for the important words on my pin. The fonts I have been using recently are “Norwester” and “Satisfy”. You can add text overly by selecting the text tab on the left of your screen. The font can then easily be searched for and selected by drop down menu at the top left of the design area.
Now we have the font its time to decide on what we want to write in the text overlay. You want to write something that will encourage people to click on your link to find out more and stand out amongst the abundance of other pins. This pin was created to link back to my review on “Wealthy affiliate” which is THE best platform for beginners to learn affiliate marketing.
To help encourage people to click on the pin and visit my site this is what I opted for;
Another method I use to help the main aspects of the pin stand out is by offsetting the same writing below the coloured writing to give a more bold effect.
The last thing you should add to your pins is some sort of branding. For this I add my logo at the top of the pin and always add my URL to the bottom of the pin. This is something you should be doing with every pin create to start to create an image for your brand. This is what the final product looks like;

I hope this post has been insightful and you now know how to make a successful pin for Pinterest. If you follow these steps I’m sure you will be able to start creating winning pins in no time at all. If you have any questions please feel free to leave a comment below and I’ll get back to you as soon as possible.
Now you know how to create visually appealing pins you’re probably ready to start growing your followers on the platform. Take a read at these easy methods to grow your Pinterest following.
